
Introduction to ClickFunnels CRM: v2.0
In this tutorial post, we will discuss ClickFunnels CRM. If you are looking for a CRM that can help you create email campaigns, blogs, websites, and funnels, then the upgraded version of ClickFunnels, which is ClickFunnels 2.0, is worth considering. With this new version, you can also analyze the performance of your emails and campaigns, monitor your contacts’ activities, and gain insights on how to improve your marketing strategies. Although the current version of ClickFunnels CRM only focuses on contact management, it is expected to be updated to a sales management CRM in the coming days.
In this post, we will explore the features of ClickFunnels CRM and how it can benefit your business. Finally, we will dive into discussions of the importance of tagging your contacts and how to do it effectively. So whether you’re new to email marketing or a seasoned pro, this tutorial will provide valuable insights on how to streamline your email marketing efforts.
Curious about the cost of ClickFunnels CRM? Check out our in-depth article on its pricing plans and bonuses!
Step 1: Accessing the Marketing Dashboard of ClickFunnels CRM
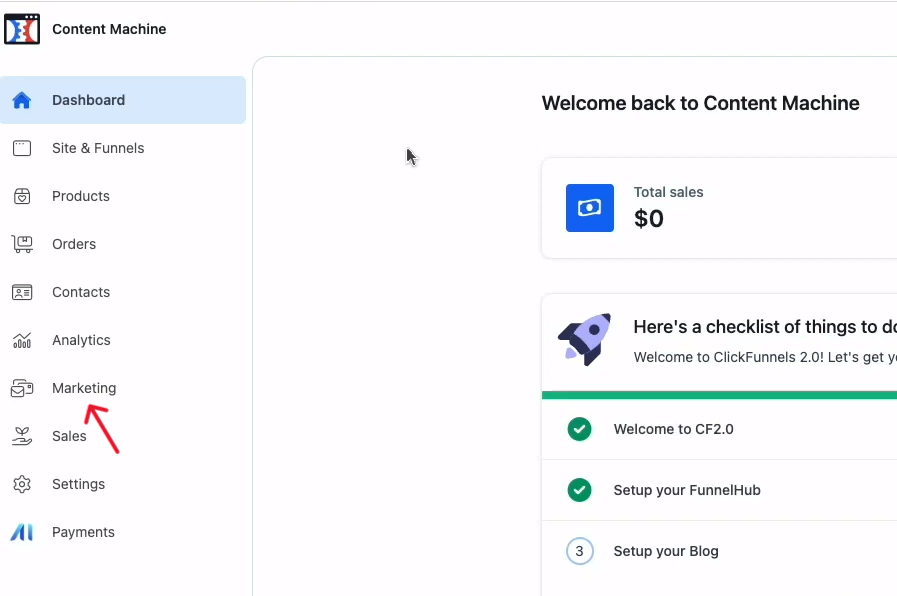
To begin using ClickFunnels CRM, navigate to the marketing dashboard located on the left-hand side of the main ClickFunnels 2.0 dashboard.
If you are interested in learning how to use Clickfunnels for affiliate marketing, you may find this post titled “How To Use ClickFunnels For Affiliate Marketing: Detailed Guide” helpful.
Step 2: Adding a New Workflow
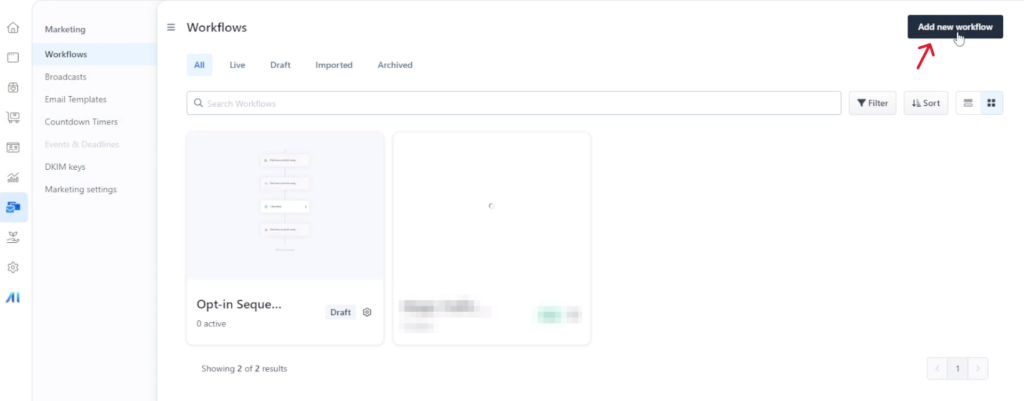
Once you are on the marketing dashboard, select workflows, and then click on “add new workflow” in the top right corner. Give your workflow a name that is easy to remember, such as “Lead Magnet Delivery.”
Step 3: Creating a Trigger in ClickFunnels CRM
After you have created your workflow, click on the “add a trigger” button to set up the opt-in trigger. Select the funnel and page within the funnel that you want to use for the opt-in.
By following these steps, you can easily set up an email workflow in Clickfunnels CRM (ClickFunnels 2.0) that will automate the process of delivering lead magnets or other offers to your customers after they opt-in to your page.
Tagging and Categorizing Your Leads
When someone opts into your lead magnet or enters your ecosystem for the first time, it is important to tag them so that you can keep track of where they came from. This can help you to organize your leads and tailor your marketing efforts accordingly. Here’s how to tag your contacts in Clickfunnels CRM.
Step 1: Add a Tag
To tag a contact, click on the little plus icon to add another step to your workflow. This will open up the right-hand menu, where you can select “Tag Contact” from the purple tags and internal things section.
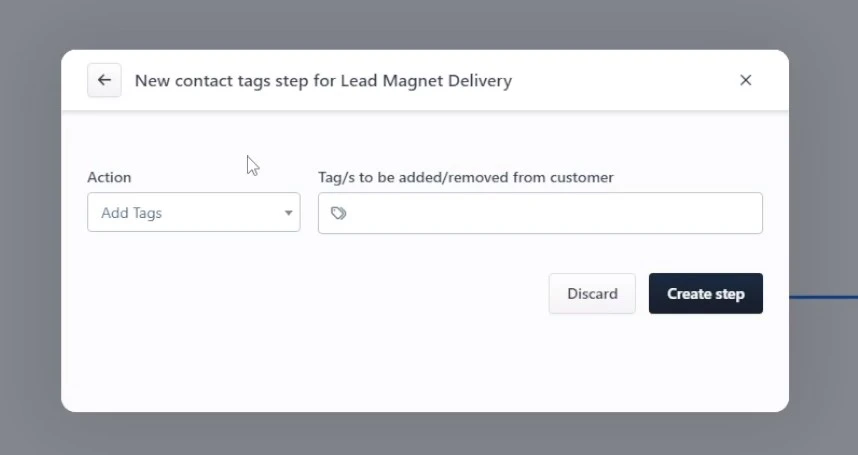
Step 2: Choose a Name for Your Tag
When you add a tag, you have the option to add or remove it later on as your leads move through your funnel. For now, we’ll simply add a tag and call it “Lead Magnet” or something else that relates specifically to this workflow.
Step 3: Save and Create the Step
Make sure to click the blue bar at the bottom of the screen to create the tag. Then, click “Create Step” to save the tag and add it to your workflow.
Remember to choose a name for your tag. This will help you to distinguish it from other tags in your system. This can be particularly important if you have multiple lead magnets or pages. By categorizing your leads in this way, you can keep your marketing efforts focused and effective.
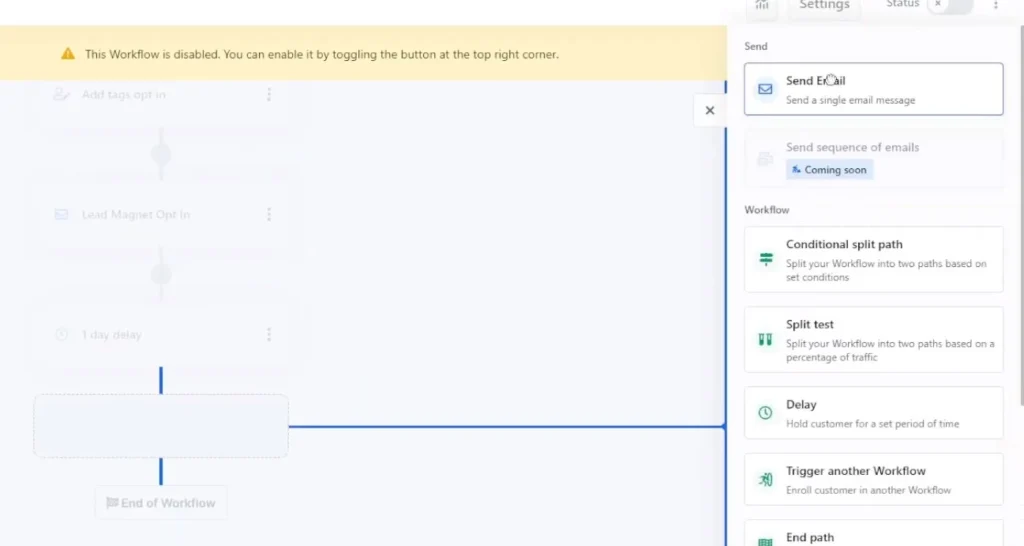
Sending an Email Right After Someone is Tagged
After someone has been tagged, it is important to send them an email right away. To do this, click on the plus button and then select “send an email” from the options. This will take you to the window where you can create the email. Give the email a name and a subject line that will encourage the recipient to open it. Use the pre-headline to provide a snippet that will further entice the recipient. Select the email address and then choose a design for the email. Click on “design email” under the template option and select the template you want to use. Once you have selected your template, click on the “Create step” to finalize this step.
Editing Email Content in ClickFunnels CRM

After creating the email step, click on the email. Then click on the edit button to modify the content of the email. This will take you to the Builder where you can customize your email by adding your logo, changing the text, and inserting images. Once you are satisfied with the content, click on “save and exit” or save it as a template if you plan on using it multiple times.
Adding a Follow-up Email
If you want to add a follow-up email to your sequence, click on the plus button and then add a delay of a day or any timeframe that you want. You can then add another email step and repeat the process of creating and editing an email.
Ending the Sequence
If you are satisfied with your sequence and do not want to add any more emails, simply end the sequence. You can do this by clicking on the plus button and then selecting “end funnel.” This will complete your automated email sequence.
If you’re considering ClickFunnels CRM, you won’t want to miss our article on the differences between Clickfunnels CRM (ClickFunnels 2.0) and Classic. Make an informed decision and choose the right version for you.
My Final Verdict on ClickFunnels CRM
In conclusion, ClickFunnels CRM or Clickfunnels 2.0 is a powerful tool for businesses looking to streamline their email marketing efforts. With features like trigger setup, tagging, and email sequencing, it’s easy to create and automate campaigns that can help convert leads into customers. While ClickFunnels CRM currently focuses on contact management, future updates are expected to expand its capabilities to include sales management. By following the steps outlined in this tutorial, businesses can effectively use ClickFunnels CRM to create successful email marketing campaigns that will help them grow their business.
Want to learn more about ClickFunnels 2.0? Check out our in-depth article on its features, dashboard, and funnels!