Introduction
Canva unveiled around 30 new features this year at Canva Create, which is a lot of features to present in just one post. So, instead of one post, we will create a series of three “What’s Hot” posts dedicated to the features announced at Canva Create 2023. In this post, we will focus on 12 new AI-powered features that have just been announced by Canva.
Magic Edit: Canva AI Editing Feature
Arthur C. Clarke, a science fiction author, once said, “Any sufficiently advanced technology is indistinguishable from magic,” At Canva, they have taken this to heart. The first AI-powered feature presented at Canva Create is Magic Edit. It is a feature that you can access via the Canva homepage, and it helps you avoid writer’s block. When staring at a blank page, Magic Edit is there to avoid all of that.
It’s a tool that allows you to replace or edit anything in an image quickly and easily. You can not only do that with the brush, but you can also type in text as to what you want to see.
Steps
- Go to canva.com/canva-create.
- Click on Magic Edit.
- Click Try It Out.
- Brush out the area you want to edit.
- Generate ideas by clicking Generate.
- Select the idea you want to use.
- Click Done.
- Edit the image further if necessary.
Example
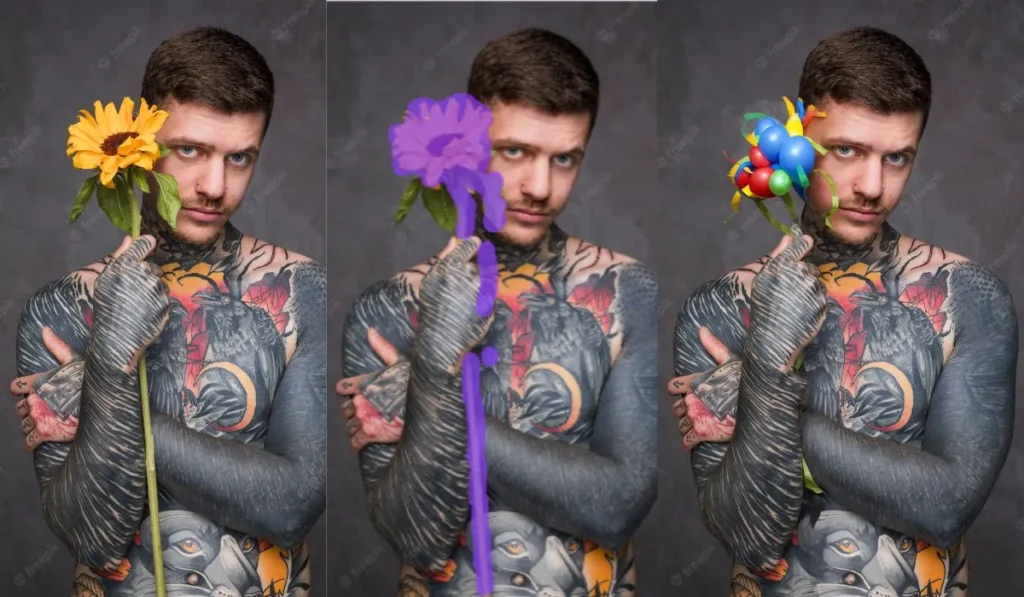
To illustrate how the tool works, let’s look at an example. Suppose you have an image of a person with tattoos holding a sunflower. With the AI Magic Edit Tool, you can replace the sunflower with balloons or anything else you want. Here’s how:
- Go to canva.com/canva-create.
- Click on Magic Edit.
- Click Try It Out.
- Brush out the sunflower the person holding.
- Generate ideas by clicking Generate.
- Select or write the idea you want to use (in this case, a bulldog tattoo).
- Click Done.
- Edit the image further if necessary (adjust the saturation, coloring, etc.).
- In less than 90 seconds, you can transform the original image into a new one with just a few clicks.
The AI Magic Edit Tool by Canva is a powerful tool that can save you time and effort when editing images. With its intuitive interface and powerful AI capabilities, you can edit anything in an image quickly and easily. Give it a try and see how it can improve your workflow.
Canva’s New AI Functionality: Magic Design
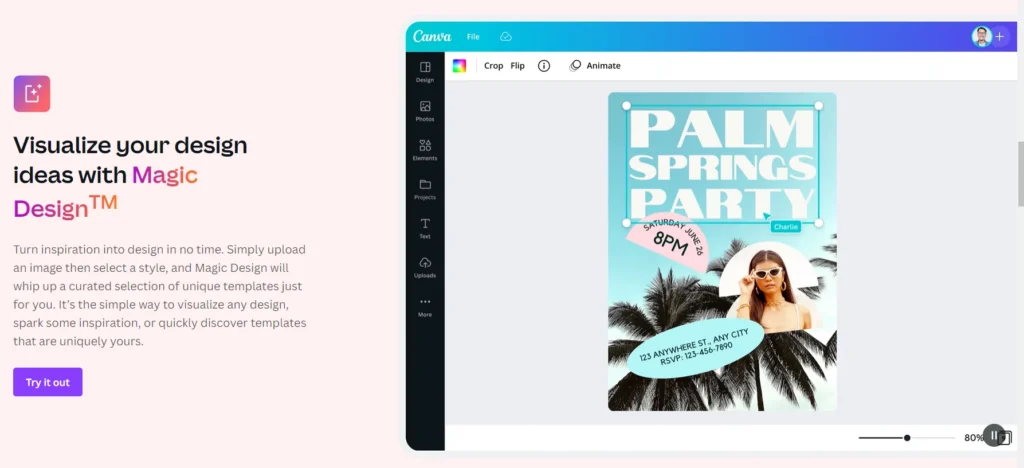
Another AI-powered feature introduced in Canva Create is Magic Design. This feature makes the design ready in just a few clicks. I love this feature of Canva.
How to Use Magic Design
The first step is to go to canva.com/magic-design. It’s also available on the home page now. Once on this page, click “Try Magic Design”. Here, you will see a few options. You can start by uploading an image and then it’s just going to come up with some ideas for you. Click on “Try it out” and here we go, now comes the magic part.
Using Magic Design
Magic Design is in beta but it’s going to give us ideas, templates, and crafted ideas with the image that we use.
For example, you can use a wedding image since that’s common and why people use Canva a lot. You can go to pexels.com and search for “wedding”. You can download a free stock image. Then, return to Canva and click on “Insert media”. Drap and drop the downloaded image on “Drop files to upload”. Once you did that, Magic Design ran its magic for you and creates eight excellent candidates for you to choose from.
Customizing the Design
If you don’t like any of the eight designs or if you want to try some other ideas, you can click on the “Media” button, choose a file, and try again. You can also click on the “Style” option to add your own colors or select a pre-made style such as “Wedding”. Once you’ve chosen a design that you like, just click on it and then click on “Customize this template”. Now, you can make any changes you want. For example, you can change the name, date, or any other text that appears in the design.
And that’s it! Canva’s new AI functionality, Magic Design, is an amazing tool that can help you create stunning designs in seconds. With no design skills or coding required, anyone can use it to create beautiful designs for their projects.
Magic Eraser
The next Canva AI-powered feature we will discuss is Magic Eraser. It is a new feature that helps you remove the background from any photo. With this feature, you can remove any unwanted items from a picture. Let’s see how to use this feature and remove some distracting elements from a photo.
Steps to use Magic Erase
- Start by selecting the photo you want to edit.
- Click on “Edit photo” to open the editing options.
- Choose the “Magic Eraser” option.
- You will be given a brush to select the items you want to remove.
- Brush over the item you want to erase, and it will disappear from the photo.
- If there is any leftover visible item, go over it again with the brush until it is completely removed.
Removing distracting elements from a photo
Let’s take a photo of a man working on his laptop as an example. Around his desk, there are various items that are distracting and clutter up the picture. We will remove them using the Magic Eraser feature.
- We start by removing a fruit basket. Brush over the item with the Magic Eraser, and it disappears. If there is any leftover visible item, go over it again with the brush until it is completely removed.
- Next, we remove a lamp by brushing over it with the Magic Eraser.
- There is still a little bit of the lamp visible, so we brush over it again.
- We then remove a framed picture on the wall, which is distracting.
- Next, we remove two out-of-focus objects at the bottom of the photo: a glass of orange juice and a croissant.
- Finally, we remove a monitor in the background of the photo.
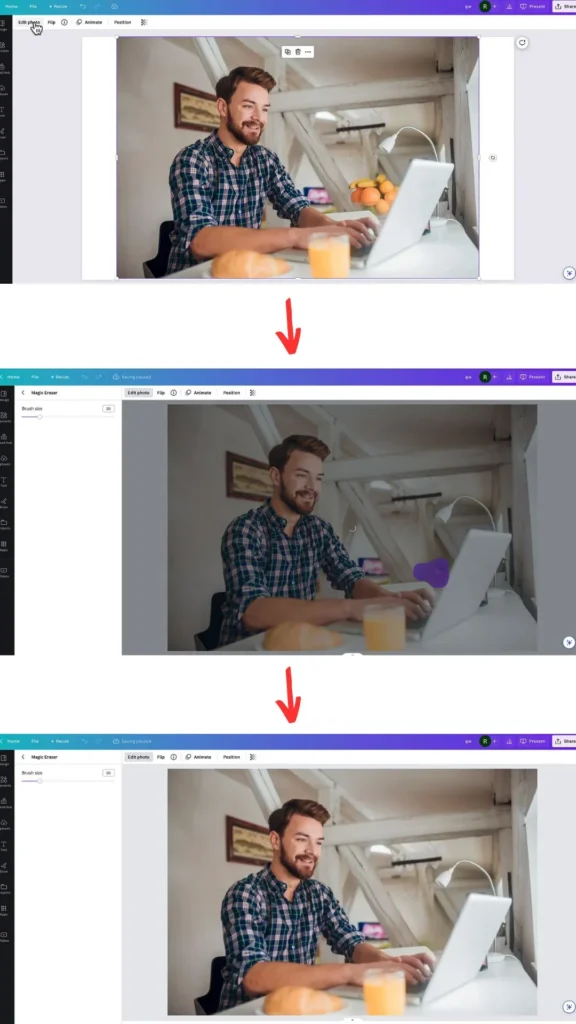
Using Canva’s Magic Erase feature, we were able to remove distracting elements from a photo. While it may not be a perfect tool, it can be a useful feature for creating presentations or graphics where the photo will be scaled down, and the removed elements will not be noticeable.
Canva’s New AI Translation Tool
Can Translation tool allows you to translate your content into over 100 languages and it does a very good job. So, let me show you first what it looks like.
Using the Translation Tool
We’ll go over here and this is an example, and you’ll see here I’m in the translate option and I’ve gone from English (this is a default design) and of course, I translate it into Swahili. Then I went a little further and I copied this in here and I went to an English-to-Swahili translator online to verify that it wasn’t just making up the words and it says the same thing as it says right here. So, it’s a good translator.
Let me show you how to get into it and get going. Also, it’s free, which is kind of nice. The first step is to go to Canva.com/canva-create. I’m going to put a link in the description below but right now this is not on the front page of Canva but it should be soon. So, you can pretty soon you’ll be able to just go to Canva.com, I’m sure but right now you got to go this way, okay?
Once you’re there, you can see there are a few different options. When we scroll down, one of the ones we’ve got here is translated. I will click on it, and then it asks us to try it out. Again, 100 languages, one click, pretty wild. It does its thing, and then it asks us to try it out again, and it’s going to load yet another browser for some strange reason. Anyway, here we go.
This is the default design, of course, you can go ahead and make different changes to it if you want to, but I just want to show you the translation options. So, here we go. It says, “Share your story” Hello all in English. All you got to do is just make sure you’re on the translate tab and then just automatically select automatically detect part of me as the chat translates from, and then we’re going to translate it to, in this case, we’re going to go to French because I can speak a little French so I’ll know if it’s trolling me, and then we just select the page that we’re applying it to. We’re going to go to page one, and then when we click translate check this out, it’s going to create a second page.
This is now page two, and here we go. This is the English version, this is the French version. If I wanted, I just go ahead and click on download here, or I click share and then I just click download, and then I can select all the pages or one of the pages and there you go. You’ve gone from English to French in literally 90 seconds.
Canva’s Beat Sync Feature: Make Video Editing Effortless
Let’s continue to explore the magic AI features of Canva. This time, we are going to look at a specific feature that will be awesome for making videos – Beat Sync.
What is Beat Sync?
Beat Sync will allow you to skip manual editing when making videos and match your video footage with a soundtrack with the click of a button.
How Does it Work?
With Beat Sync, Canva’s AI technology recognizes the peaks in the music in your soundtrack and creates markers to align your footage on the timeline. This eliminates the tedious and manual process of syncing your footage to a beat.
Let’s Try It Out
To test out Beat Sync, we’ll use a video project that we’ve already laid out. We’ll start by finding a soundtrack in Canva’s audio library. After selecting the track, we’ll click on Beat Sync, and the AI technology will align our footage with the peaks in the music.
Beat Sync is a pro feature, which means you’ll have access to all of the pro soundtracks in Canva. It works in video and social media document types, but may not work in your presentation or other document types. Thank you, Canva, for Beat Sync!
The Magic of Canva AI Draw Feature
Canva is an amazing graphic design tool that enables users to create stunning graphics in a few clicks. Canva has been continuously improving its features to enhance the user experience. One of the most exciting features of Canva is the “Draw” feature. This post will explore how to use this feature to create hand-drawn elements.
Draw Feature Revamp
The Draw feature was an app that Canva users could access to hand draw or sketch on any document. Now, the Draw feature is conveniently located in the object panel with a series of different pens. The new version has a more intuitive and easier-to-use revamp.
Using Draw Feature
To use the Draw feature, locate it in the object panel, click on it, and select one of the three different pens available. You can also use the eraser to remove any unwanted elements. The color button allows you to select any color from your brand kit colors. Once you have customized your pen, you can start drawing on your document.
How to Edit Drawn Elements
You may easily erase your drawing and start over if you’re not happy with it. The color of any element can also be changed by using the cursor to select it. The ability to group elements makes it simple to modify the color of numerous elements at once.
Shape Assistance Function
Shape Assist is yet another intriguing function of the Draw tool. You can draw simple forms like a circle or rectangle using Shape Assist, and Canva will automatically refine them. The shape can then be modified, resized, and its color altered. Other forms like a star or a line can also use the Shape Assist feature.
Canva’s Draw feature is a powerful tool that allows you to create hand-drawn elements easily. With the addition of Shape Assist, drawing basic shapes has never been so magical. Whether an experienced designer or a beginner, the Draw feature is a fun and easy way to add a personal touch to your designs. Give it a try!
Learn how GPT-4 converts a napkin drawing to a website.
The Next AI Feature that was Announced at Canva Create is Magic Write Everywhere
At Canva Create, the latest feature that was announced is Magic Write Everywhere. We already knew about Magic Write in Canva Docs, which is Canva’s text generation AI tool, but now it is available in all Canva doctypes, including websites, social media documents, presentations, and even whiteboards.
How to Use Magic Write Everywhere
To launch Canva Right, you’ll have to locate Canva Assistant, which is also a new feature. Click on the assistant and select Magic Write. It should be right there, and you can prompt it to generate text for you. For example, you can describe the Mona Lisa in three simple paragraphs, and Magic Write will create them for you.
Features of Magic Write
Magic Write is like ChatGPT within Canva, and it is pretty fast. While it is free for users, there is a limit of 25 prompts lifetime for free users. Canva Pro users have access to 75 prompts per user per day.
Canva AI Assistant Offers Additional Prompts for Designing
In addition to Magic Write, there are other prompts available in the Canva Assistant, including summarizing text, expanding on the text’s meaning, developing and creating more than three power graphs, rewriting, and editing.
Editing with Magic Write
You can also edit with Magic Write. For example, you can rewrite text to make it rhyme or give it a poetic touch. Magic Write generates text lightning-fast and accurately, making it a useful tool for creating websites, social media documents, presentations, and more.
Magic Write Everywhere is a powerful AI tool that is now available in all Canva doctypes. With its ability to generate text quickly and accurately, it is a valuable asset for anyone creating content for websites, social media, and presentations.
Read “Best Copywriting Tools: A Guide On 6 AI-Powered Tools” to learn about 6 AI writing tools like Magic Write and ChatGPT.
Magic Replace Feature With Canva AI
To use Magic Replace, head to your brand hub, select the specific brand kit affected by the change, and click on the three dots next to the old logo or photo. Then, select “Replace Across Designs,” and Canva will generate a list of all documents that contain the specific logo or image. Select all of them and click “Continue.” Canva will then allow you to replace the old logo or photo with a new one that has the same aspect ratio. After previewing the change, click “Replace in the [number of] Designs,” and the new logo will replace the old one.
Create Animation
To use Create Animation, select an element, click on the “Animate” button, and then click “Create Animation.” Drag the element around the canvas to create a path, hold “Shift” to create straight lines, and control the speed of the animation by moving the element faster or slower. Once done, complete the animation by releasing the element. Users can also choose from various movement styles, such as “Original,” “Smooth,” or “Steady,” to customize the animation.
Magic Presentation: Create Slides Easily With Canva AI
The next new feature on Canva is called Magic Presentation, or Magic Design within a presentation. It creates a template and populates it with relevant content according to your topic, unlike most templates that use dummy content. All you need to do is describe your presentation topic using five or more words, and the feature will generate a draft presentation for you instantly.
Let’s say you want to create a presentation on the rise of sneaker collecting. All you need to do is select the template you want from the options provided, and the feature will generate a title, an introduction statement, and relevant content for your presentation. You can ideate on this content and adjust it to your liking by adding your own photos and other elements.
This feature will make creating presentations much easier for users, and it’s available to all free and pro users on all devices.
Text to Image: Midjourney of Canva AI
The next Canva AI feature is the Text to Image feature which has received an upgrade. It now has three sets of filters for three different types of outcomes – photography, digital art, and fine art. You can choose from a variety of presets, filters, and styles for your images. Additionally, you can still select your aspect ratios and choose your preferred color palette.
To use this feature, all you need to do is type a prompt, and the feature will generate an image based on your prompt. You can then play around with the styles and filters to adjust the image to your liking. This feature is available on Canva’s app.
Improvements in Canva Layouts and Styles with AI
Layouts are not a new feature in Canva, but they have been improved to suggest layouts based on the elements you add to your slide. For instance, if you add a new photo or element to your slide, Canva will suggest different layouts based on that element. The more elements you add, the more layout options you will have. This AI-powered feature helps you arrange your slide with ease.
Using Patterns with Canva AI
Canva’s layout feature also allows you to use patterns as your slide’s background. Once you add a pattern, Canva will suggest different layouts based on your pattern.
Improved Styles of New Canva AI
Canva’s Styles feature has also been improved with AI-powered suggestions. You can now select the style of your recent designs, including color palettes, font sets, and combinations. Additionally, Canva’s Styles feature now suggests a palette of colors extracted from your images, allowing you to match your slide’s colors with your images.
Canva’s AI-powered improvements in Layouts and Styles make creating professional presentations even easier. These new features suggest layout options and styles that complement your design, saving you time and effort.
Conclusion: Canva AI Features
Finally, Canva Create 2023 has unveiled a number of new AI-powered features that can facilitate better productivity for both designers and non-designers. Magic Design can provide design ideas and templates for a user’s projects, while Magic Edit can swiftly and easily help change or edit any portion of an image. Another new function that can assist in removing unwanted components from an image is Magic Eraser. Anyone wishing to produce high-quality graphics can save time and effort by using Canva’s new AI tools because they are simple to use.